Showing posts with label wire. Show all posts

Monday, June 20, 2016

The Sea and Me: A Story of Blessing in Disguise

May this year, I misread my plane schedule on my flight back home from Seoul to Jakarta. Fortunately, the real flight schedule was a day after my assumed date, and not the previous. The horror it will be to miss the plane.

I booked a room at Incheon Airport Hotel Oceanview which is about 20 minutes from Incheon Aiport. It's a a bit far, but they had shuttle service to and from the airport so it was still okay. I chose that place because not only does it have shuttle, but it was also very close to the beach. Just about 2 minutes walk.

Because my room was not ready yet, I decided to kill some time by strolling at the beach. At first, it looked so bleak. It was cold, windy, not many people around-which is actually perfect, a bit of some garbage in the corner, and many broken seashells. I decided to take a stroll at the beach and to my surprise I found sea glasses!

Sea glasses are basically glasses that are tumbled by the sand and sea water, giving it a very frosty look. I have been to many beaches in Indonesia (including ever so popular Kuta in Bali) but I have never ever seen a sea glass before. I was as ecstatic as a kid given ice cream upon this discovery. I ended up collecting as many as my hands could bring.

Last weekend I tried being productive and thus it resulted in this necklace. It is very much inspired by Halcraft's Beach Keen Necklace, but tweaked to suit my supplies.

 First sea glass spotted at a Eurwangni Beach, Incheon

 
Broken sea shells by the beach 

Sea Glass Necklace
 
 
 Close up

Tools:
Round nose plier
Flat plier
Wire cutter

Materials:
Sea glass
Plastic beads
Seed beads
Sea shell
Sea-themed charm
Pearl
Chain
26g gunmetal wire
Jump rings 
Blue cord
Violet suede cord
Cord stopper
Necklace clasp


Friday, February 26, 2016

I got the eye of the tiger!

Tiger eye stones makes me wanna sing Katy Perry's Roar but also at the same time reminds me of Rocky Balboa.

I happened to find nice tiger eye chips in a craft store in Semarang, Toko Satria, for Rp 15k/string. That is less than a dollar. I just had to buy two strings.

At Toko Satria's sister store, Ratu Paksi, I found round tiger beads in different sizes. I bought a 6mm tiger eye beads string for Rp 35k and also-if I'm not mistaken-a 14mm one for Rp 75k. It is way, way, wayyyyy cheaper to buy tiger eyes in strings because once it becomes a bracelet or any other jewelry, the cost of it is equal, or maybe more expensive than buying it in strings. I also bought assortments of other natural stone beads. It's so darn easy to spend money in those stores. Bead hoarder I am!

I turned the tiger eye chips into a ring, which looks a bit too big and messy for me but somehow my senior. who lives in Yangon, Myanmar, loved it and wanted one. So then I made one for her and also added another ring (which the stone she gave me from Yangon) and a dangly pair of earring.

Oh, funny thing is that although tiger eye beads are abundant in Yangon, my senior said that she can't find tiger eye stone chips. I guess Indonesia has more variety than Myanmar.

Here are the pics of the jewelry and way down is the tools and materials used. Enjoy!

My tiger eye ring. I haven't used it yet because it feels rather bulky.
The ones for my senior.

Tools:
Round nose plier
Flat plier
Wire cutter
Ring mandrel

Materials:
Tiger eye chips
4mm tiger eye beads
6mm tiger eye beads
Random green natural stone
0.8mm wire
Chain
Headpins
Earring hooks


Wednesday, February 3, 2016

Pretty in Pink


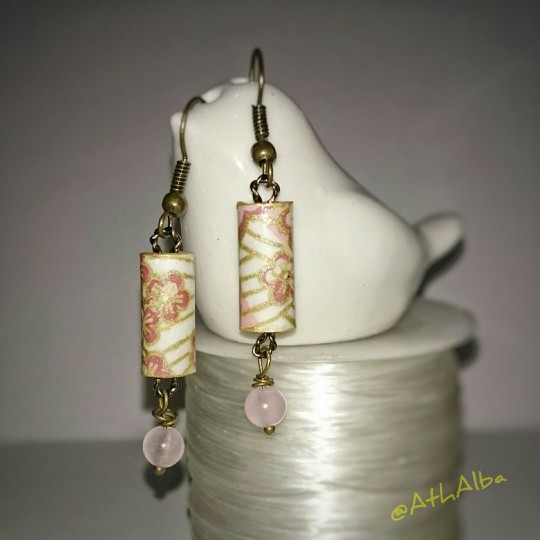
Some things that I made for a friend who adores pink stuffs and also shabby chic thingamabobs.
These are a mixture of origami, decoupage, a little beading, claying and everything else in between.

O yeah, this post will be writing heavy but I'm gonna list everything I used just in case someone would like to make something similar. If there's any question, just holler at me. :

Materials:
 Flashdisk
Shabby chic metal container
Craft foam
Origami paper
Glossy Accents
Crackle Accents
Origami paper
0.5mm wire in Gunmetal
Masking tape
Pink acrylic paint (I mixed red, white and a bit of Ranger Ink's Liquid Pearl in White Opal)
Gold acrylic pain
Memento ink in red (don't really remember what exactly)

Dreamcatcher Necklace
Round wire (I used a thin wire bangle wrapped with sticky tape to poof it up)
Pink satin ribbon
Pink acrylic paint (see above)
Water spray (for the ombre effect)
Nylon thread
6mm Rose Quartz
4mm Indian Agate
White stone chip
Metal butterfly
Salem lace
Cord closures
Eye pin
Jump ring

Binder clips
Binder clips in different sizes
Colourful masking tape (or washi tape, you use what you have)

Paper clips
Metallic paper clips
Hot glue/epoxy clay (epoxy clay is much more safer and neater to me than hot glue)
Acrylic paints
Glitter
White glue
Liquitex acrylic sealer

Tools
Round nose plier
Chain nose plier
Wire cutter
Scissor(s)
Needle
Paint brushes
Mod melt molds
Glue gun (if you're using hot glue)
Nail file/sandpaper (if you're using epoxy clay)
Silicone/non-stick mat
Rubber stamp


Monday, February 1, 2016

The Owl...


Pussy said to the Owl, “You elegant fowl! How charmingly sweet you sing! O let us be married! too long we have tarried: But what shall we do for a ring?”
Edward Lear - The Owl and the Pussycat

I have no idea what focal stone that is being used here. I think, in Indonesian, it’s a “kecubung karang”. Kecubung is amethyst and karang is coral. But who knows, I’m no geologist.

For the wire, I used 0.8 Artistic Wire in gunmetal, another gunmetal coloured wire size 0.4, and two other type of wires for the tail and the branch. Other stones that I used are un-named pebbled stones, tiny cat eye stones and two yellow crystals.

The idea originally came from Nancy Wickman. I like it so, so much that I have to make one of my own. Do you believe that this is my first try in making this owl? Not bad, eh. Hehe.

Also posted here

Materials:
cabochon
small cat eye beads
two yellow crystal beads
white pebble beads
0.8 mm Artistic Wire in gunmetal
0.4 mm wire in gunmetal
0.8 mm soft rose-gold wire
1 mm copper wire
eye pins
toggle clasp
gunmetal chain

Tools:
round nose plier
flat nose plier
wire cutter
nylon hammer

Tuesday, January 26, 2016

Cherry Rose Earrings


“Even the cherry tree, swaying through time
Will eventually blossom”
Utada Hikaru - Sakura Drops

So, this is a bit of something that I made during my night of insomnia. You'd think with one whole night I'd made a flock of these. But no, I could only manage a pair.

Materials:
Paper
Gold pen
Rose quartz beads
0.4 Gunmetal Wire (I think? Or 0.5? Can't remember)
Eyepin
Earring hook
Paper glue
Glossy Accents 

Tools:
Round nose plier
Chain nose plier
Wire cutter
 
Also posted here.

Monday, August 31, 2015

Faux Rutile... Sort of

This is my attempt on making a faux rutile using glossy accents.

The earrings didn't turn out exactly like real rutile - the "strings" in my faux ones being too many and too chubby - but this pair of earring has its own charm.

 This is the end product


This is how it is made

MATERIALS:
Glossy Accent (or resin, but I don't have resin)
Gold Acrylic Paint
Sculpey Cabochon Mold
Wire
Pliers
Blank ear hooks

TIME:
Days and days.... Patience is your friend

Monday, July 13, 2015

Hi, I'm back!

And I try to make this as permanent as possible.

Lately I've been obsessed with making faux opals out of glue. The original tutorial states making faux opals out of resin or polymer clay, but all I had was glue, and why not try? Turns out that they kinda work.

I use two types of glues, white glue (my brand is Fox) and Glossy Accents. Sometimes I use them separately; sometimes I mix them up by using them layers upon layers. The shine is achieved by using iridescent glitters. I didn't buy them pre-made; I made them by cutting iridescent sequin leaves.

The drying time takes literally days. I put them near heat to speed things up a bit, but only by a bit. With craft like this, it's better to be patient to achieve that transparent look.

Maybe next time I'll make one that clearly has colour, like black, or baby blue, or baby pink.


This is made purely out of Rangers Glossy Accents

The left is made out of white glue while the right is made from Glossy Accents

This is what the pendant look from different angles. No flash is used here.


Note: I made the lovely dangly herringbone wrapped bead from Heidi K's tutorial at earthbreathedesign.com. Go check it out!

Monday, August 15, 2011

Memory Wire... added with Paper Beads


After months of being neglected, my paper beads have finally come to use. It looks cheesy tho and I still can't really remember whether or not I have varnished it. But oh well, at least now I have one new bracelet. :)

Thursday, August 11, 2011

Memory Wire... What the heck is it?!


I've posted this in my tumblr but it's in Bahasa Indonesia and I wanted to give it a go in English.

So, in searching for a cool jewelry inspiration, I stumbled upon two words, "memory wire". I had no idea what a memory wire is. Could it remember something? Or was it like electricity cable? I was seriously clueless.

After doing a serious googling, I founded out that memory wire is a type of wire that could retain its shape. Then it came to my mind a certain bracelet with blue cat's eye beads that I had years ago which use this particular wire. I also see such bracelets at accessories shops and even had the liberty to explain to my sister about this particular wire.

What I didn't know was that I had actually bought a pack of memory wire without knowing it. I thought it was just normal wire (again, normal here means not too thick, nor too thin). It looks thin and easy to bend but when I actually tried to bend it, oh boy... you don't want to know.

That's when I realized that I actually had memory wire all this time. The one that I have reminds me of slinky. I wouldn't play it like one tho, because it easily gets tangled. And believe me, when it's tangled, it is difficult to sort it out. Trust me, I've tried to untangle it from the start of National Treasure 2 until the end - which includes the credit rolls - and it is still tangled. Boo.

Fooling around with the memory wire. :D

Made it Myself Jump Rings.


These jump rings are the result of my cheapness and curiosity

I was bored using my usual copper coloured jump rings so I decided to make my very own silvery jump rings. At first I tried with my normal wire (normal being that it's not too big, neither it's too small) but in the end I couldn't manage to cut it off. Gawd, I nearly bruised my fingers and busted my wire cutter!

Eventually I used a smaller wire size, 0.5 to be exact. I was rather afraid if it would easily bend but after making a string of jump rings, it was quite inflexible. Therefore I decided to make a bunch of it while watching "The Count of Monte Cristo" - which is a good film, btw.

I might make smaller jump rings with coloured wire someday later in the future.

Things needed:
1. Wire
2. Something cylindric - I used a 3.0mm screw driver.
3. Wire cutter - one that is strong enough to cut the wire.
4. Patience - yes, this is definitely required!

Sunday, July 24, 2011

More Wire Cage Pendants


I was a bit on fire when after I made my purple stone pendant. It resulted in these blue glass stone and white garden stone pendants.

I don't remember when or where I got the white garden stone one but the blue glass one I got from one of my neighbours back in Sydney. I've had it for like 15 -16 years.

My Purple Stone - Finders, Keepers!


Being born in February, whenever I hear the word "amethyst" my ears perk up. That's why, when I saw amethyst pendant being sold at Kinokuniya, I badly wanted to buy it. But alas, it cost around Rp 90 thousand something which roughly cost around US $ 8 till US $ 10. I don't know whether that would be expensive or not for US range, but it sure is in Indonesia.

Fortunately for me, I somehow found this purple stone in my drawer in my room in Jakarta. It has a unique shape although it's rather chipped on the bottom. I guess it belonged to the previous owner (she moved to a room next to mine) or the previous owner's previous owner. Anyway, being petty as I am, I didn't tell my neighbour about the stone and decided to claim it as my own. Finders, keepers people! :p

As soon as I got back to Semarang, I turned it into a pendant. The wire cage is more or less like the one I used in my cage pendant and the string is made from suede cord. It's not as good as the ones found in Kinokuniya, but it sure looks ethnic enough for me.

It's cheap, it's pretty, it's limited = it makes me happy! :)


You can't really see the chipped part, can you?


Resting prettily on my neck.

Saturday, October 2, 2010

Caged Heart


Basically I got this project from Cut Out and Keep (sorry if there's no credit, I'll try to find it later on), but there was no how-tos so I had to figure it out on my own. I have to say that this is way easier than math.

The heart is made from Amos Air Dry Clay because I couldn't find any teeny weeny heart charm. I was planning to put a yellow butterfly but then I realized that it was a yellow ribbon, not butterfly. Thank goodness for my procrastination! :p

Well, anyway, the photo above is the result. I think it looks pretty cool for someone being so lame in wire craft. Hehe.

Monday, September 27, 2010

Cage Pendant

Few months ago I had this obsession about wire, especially wire wrapping. It looked so easy, those wrapping stones, gems, and so on using craft wire. However, when I tried it the first time, it was a total mess. I gave up.

Then, last August I tried to give it another go. And tada! I finally did it! I tried to use a small sea shell, but it didn't work. So, I have to make do with this plain blue marble (and it doesn't even have a marble-y texture).

If you want to try to make one, here's the link to the site. It's not that hard to make, seriously. :)

I also posted this on my Cut Out and Keep account, AthAlba, just in case if you want to see the site.


My cage pendant. What do you think?